
Best of 2023: Setting up Kubernetes in an On-Premises Environment
As we close out 2023, we at Cloud Native Now wanted to highlight the most popular articles of the year. Following is the latest in our series of the Best of 2023.
Kubernetes plays a leading role in deploying applications across different platforms. This is a major step up compared to the traditional way of deploying applications and offers a more comprehensive way of achieving continuous integration (CI) and continuous deployment (CD) enabling robust resource management using Kubernetes API. This blog explains how to install and configure a Kubernetes cluster on bare metal (on-premises).

Prerequisites:
In this setup, we are using one master node and two worker nodes.
ISO image version: Ubuntu 20.04.2 LTS (all nodes)
Virtual box/hypervisor: To deploy VM’s
Internet access
Hardware specifications:
Master node: RAM: 8GB, CPU-4
Worker nodes: RAM: 4GB each, CPU-2
Assuming that you created virtual machines with the above specifications, here are the steps for Kubernetes setup.
Docker installation:
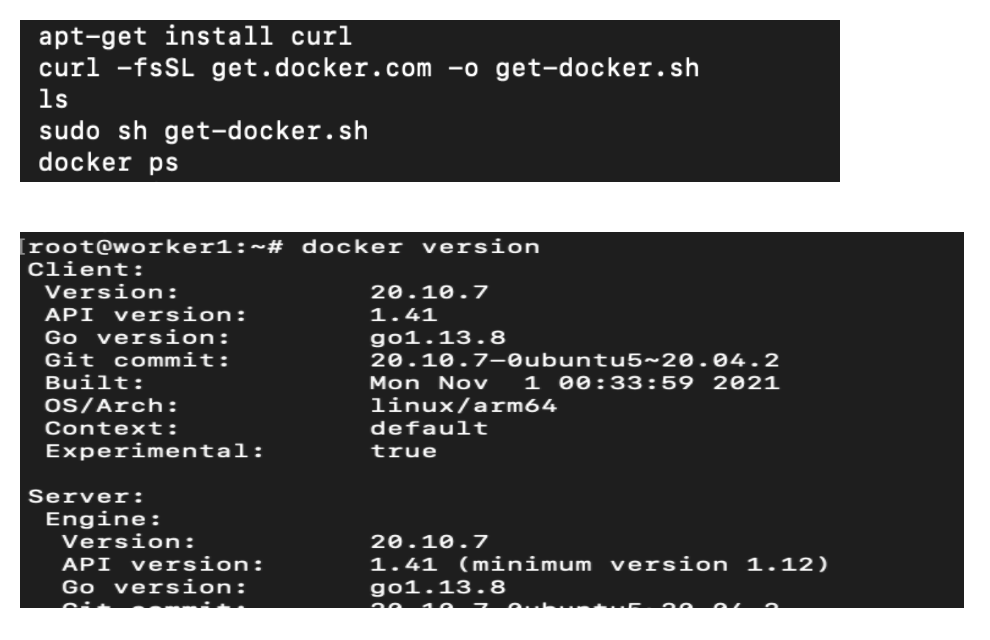
Install Docker on all three machines
# sudo apt-get update
# apt-get install curl
# curl -fsSL get.docker.com -o get-docker.sh
# sudo sh get-docker.sh
# docker version
Update the hostnames in all the nodes for easy understanding of the environment.
# apt-get install vim
# apt-get update
# vi /etc/hosts

Get the IPs of all the nodes and save them in /etc/hosts on all the machines.
Then update the hostname in /etc/hostnames
Restart the machine for the changes to take effect.
Kubernetes Installation:
Follow the below commands step-by-step in master nodes:
# swapoff -a (this is used to turn off the swap memory in all the nodes)
# apt-get update && apt-get install -y apt-transport-https
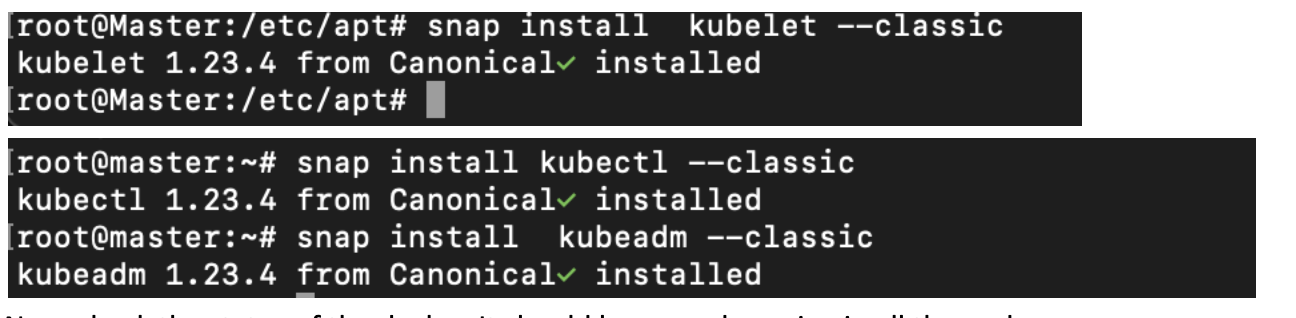
# snap install kubelet –classic
# snap install kubectl –classic
# snap install kubeadm –classic
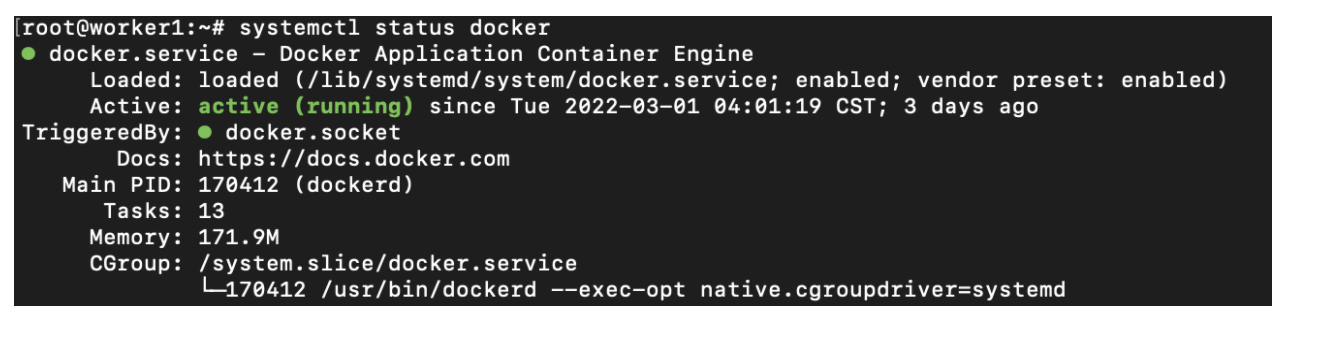
Now, check the status of Docker. It should be up and running on all the nodes.
# kubeadm init –pod-network-cidr=10.211.0.0/16
In case you have multiple master node interfaces and want to specify the IP address of the API server manually, you can define it using the following command.
# kubeadm init –pod-network-cidr=10.211.0.0/16 –apiserver-advertise-address=<Ip address of master node>
Once the cluster is initialized, we get the following message: “Your Kubernetes control-plane has initialized successfully!” as shown below. Save the join token in Notepad and execute it on all the worker nodes to connect to master.
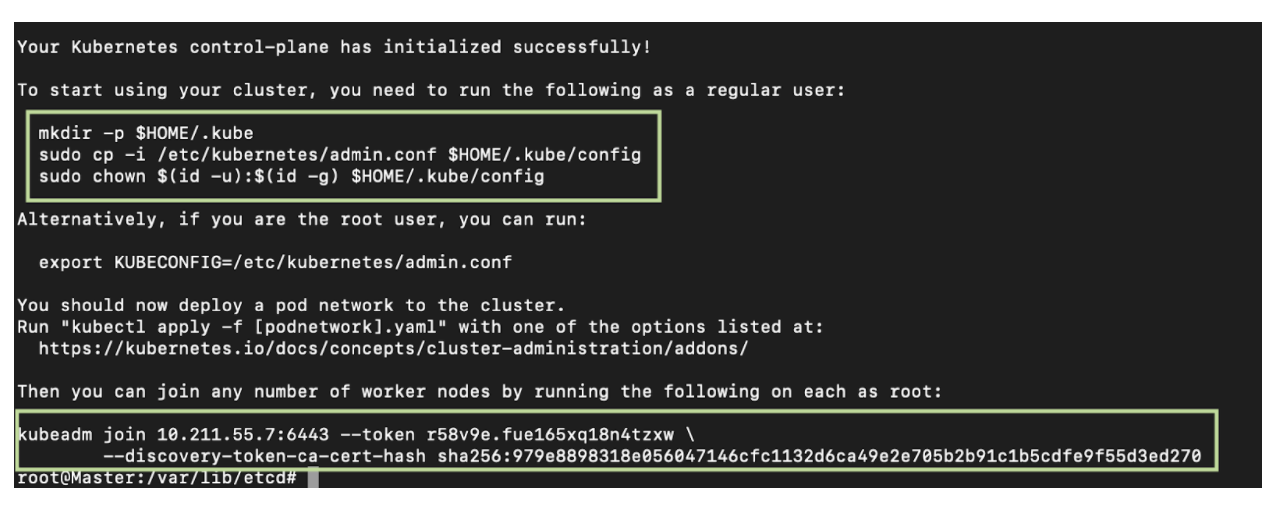
To start using your cluster, you need to run the following commands on the master node.
# sudo mkdir -p $HOME/.kube
# sudo cp -i /etc/kubernetes/admin.conf $HOME/.kube/config
# sudo chown $(id -u):$(id -g) $HOME/.kube/config
Alternatively, if you are the root user you can run:
# export KUBECONFIG=/etc/kubernetes/admin.conf
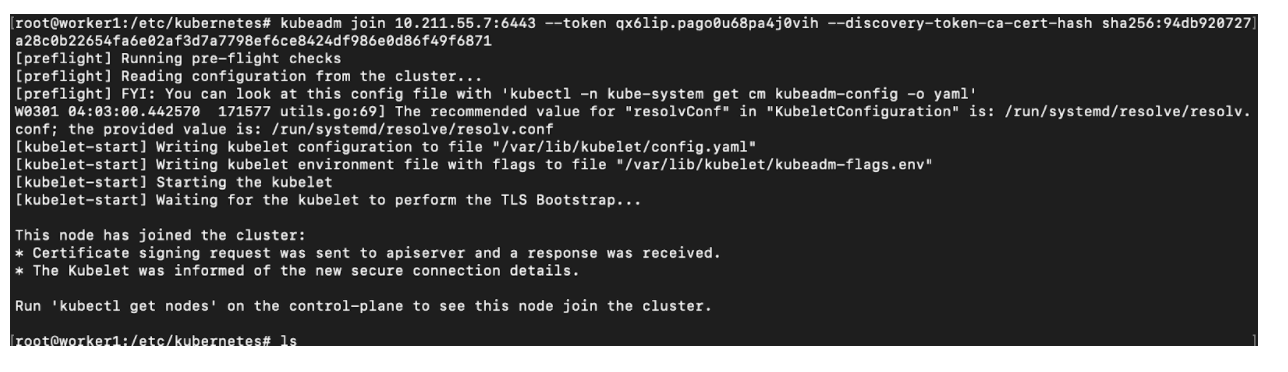
Then you can join any number of worker nodes by running the following on each worker node as root:
# kubeadm join 10.211.55.7:6443 –token r58v9e.fue165xq18n4tzxw \
–discovery-token-ca-cert-hash sha256:979e8898318e056047146cfc1132d6ca49e2e705b2b91c1b5cdfe9f55d3ed270
Now check the status of Kubernetes nodes by issuing the below command:
# kubectl get nodes –o wide

Here, when we are configuring the worker node to the master node, we may encounter an issue while adding the node. If that happens, we need to add the cgroup driver details as follows:
Change the cgroupdriver to systemd default and reload the Docker daemon (we are making this change as Kubernetes recommended cgroupdriver is system).
Add the following content /etc/docker/daemon.json:
$cat /etc/docker/daemon.json
{
“exec-opts”: [“native.cgroupdriver=systemd”],
“log-driver”: “json-file”,
“log-opts”: {
“max-size”: “100m”
},
“storage-driver”: “overlay2”
}
After making this change, reload and restart Docker on the master node.
# systemctl daemon-reload
# ßsystemctl restart docker
Execute the same in all the nodes.
You can check the following file for changes:
# vi /usr/lib/systemd/system/docker.service
Look for the command:
ExecStart=/usr/bin/dockerd –exec-opt native.cgroupdriver=system

Now, add the join command in all the worker nodes, which shows the output as follows:
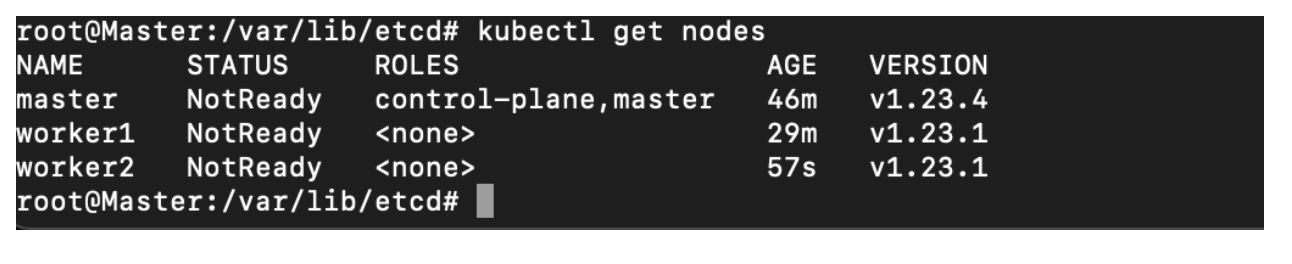
Once you’ve added all the worker nodes to the cluster, execute the following command to check the status of the nodes:
Now, we need to add the roles to nodes as follows:
# kubectl label node worker1 node-role.kubernetes.io/worker=
# kubectl label node worker2 node-role.kubernetes.io/worker=
# kubectl get nodes -o wide
The cluster is ready. In this setup, we are using Flannel for network connectivity to this cluster.
# kubectl apply -f https://raw.githubusercontent.com/coreos/flannel/master/Documentation/kube-flannel.yml

However, the user can choose to use Calico instead of Flannel for better performance and reliability.
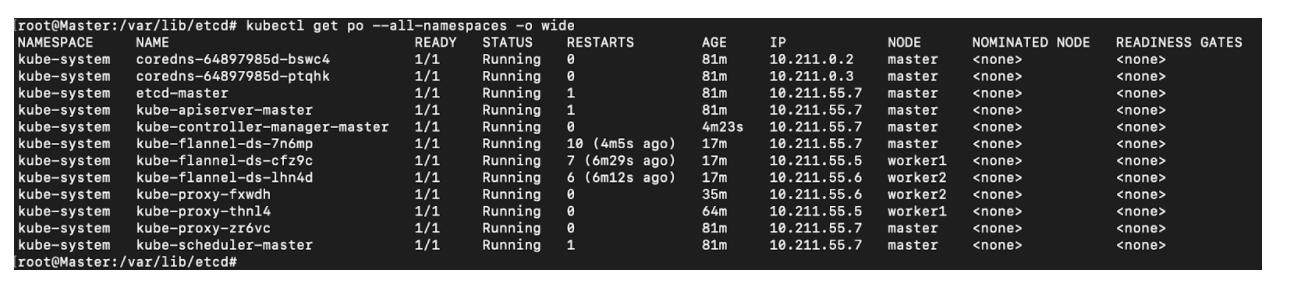
The cluster is ready.
Kubeadm troubleshooting:
# systemctl status kubelet
# journalctl -xeu kubelet
# kubectl cluster-info dump
